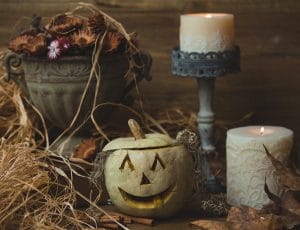
Why Choose DIY Halloween Decor?
Making your own decorations isn’t just about saving money — though that’s a big plus. It’s also about:
-
Creativity – Every project can be customized to your space and theme.
-
Sustainability – Many props use recycled or repurposed materials.
-
Memories – Crafting is a fun way to get family and friends involved.
-
Uniqueness – You’ll never have the same setup as your neighbor.
Whether you want a playful pumpkin patch or a full-on haunted house, DIY is the way to go.
How This Guide Works
To make things easy, projects are grouped by difficulty:
-
Beginner projects – Quick, inexpensive, and perfect for first-time crafters.
-
Intermediate projects – Involve sturdier builds and finishing details.
-
Advanced projects – Larger props, framing, and even some electronics.
Each project comes with a short intro, materials and tools list, and clear step-by-step instructions. You can start small and work your way up, or go all in with advanced builds right away.
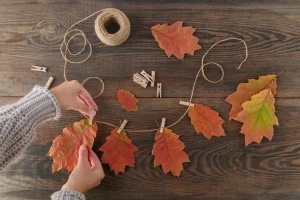
Part 1: Beginner DIY Halloween Decor Projects
If you’re new to crafting, these beginner-friendly projects are the perfect place to start. They’re simple, affordable, and make a big impact with minimal effort.
1. Mason Jar Luminaries
Want to add some spooky glow to your porch or windows? Mason jar luminaries are a quick and fun project.
Materials: Mason jars, tissue paper (orange, black, white), Mod Podge or glue, paintbrush, tea light candles (real or battery-powered).
Tools: Paintbrush, scissors.
Steps:
-
Cut tissue paper into strips or shapes.
-
Brush Mod Podge on the jar and apply the tissue paper.
-
Overlap layers for texture, leaving some translucent areas for light.
-
Add black paper cutouts (bats, pumpkins, ghosts).
-
Seal with a final coat of Mod Podge.
-
Drop a candle inside and enjoy the glow.
2. Floating Cheesecloth Ghosts
These lightweight ghosts look like they’re hovering in mid-air — a classic, budget-friendly decoration.
Materials: Cheesecloth, liquid starch or fabric stiffener, balloons or foam balls, black felt.
Tools: Scissors, glue, string (if hanging).
Steps:
-
Inflate a balloon or use a foam ball as the ghost’s head.
-
Drape cheesecloth over it.
-
Saturate the cloth with liquid starch.
-
Let it dry completely.
-
Add black felt eyes and mouth.
-
Pop the balloon or remove the foam ball.
-
Hang with string or place upright.
3. Paper Bats Wall Display
Transform a blank wall or front door into a dramatic bat swarm.
Materials: Black cardstock or construction paper, double-sided tape or adhesive putty.
Tools: Scissors, bat stencil (optional).
Steps:
-
Trace or freehand bat shapes on the paper.
-
Cut out a variety of sizes.
-
Fold wings slightly for 3D effect.
-
Stick to walls in a flying pattern.
4. Painted Pumpkin Faces
Perfect for families with kids, this project avoids the mess of carving while still creating festive pumpkins.
Materials: Pumpkins, acrylic paint, brushes, markers, sealant spray.
Tools: Paintbrushes, markers.
Steps:
-
Clean and dry pumpkins.
-
Sketch fun or spooky faces with a marker.
-
Paint with bright colors.
-
Seal with spray to protect from weather.
5. DIY Halloween Wreath
A wreath is a great way to set the mood before guests even enter your home.
Materials: Foam wreath form, black ribbon, fake cobwebs, plastic spiders, hot glue sticks.
Tools: Hot glue gun, scissors.
Steps:
-
Wrap wreath form with black ribbon.
-
Stretch fake cobwebs around it.
-
Glue plastic spiders and Halloween accents.
-
Attach a ribbon loop for hanging.
Part 2: Intermediate DIY Halloween Decor Projects
Once you’re comfortable with basic crafts, try these medium-difficulty projects. They involve sturdier materials and a little more time, but the payoff is huge.
6. Cardboard Tombstones
Give your yard the look of a haunted graveyard with lightweight tombstones.
Materials: Cardboard, gray paint, black paint, hot glue, clear sealant.
Tools: Utility knife, paintbrush, hot glue gun.
Steps:
-
Cut cardboard into tombstone shapes.
-
Glue layers together for strength.
-
Paint gray and dry-brush with black for texture.
-
Add funny or spooky epitaphs.
-
Seal with clear spray to weatherproof.
7. Hanging Witch Hats
Create floating witch hats that glow from above.
Materials: Black cardstock or cheap hats, fishing line, battery-powered LED lights.
Tools: Hot glue gun, scissors, needle.
Steps:
-
Thread fishing line through the tip of each hat.
-
Insert LED lights inside.
-
Hang from ceiling or porch beams.
8. Skeleton Hands Pathway Stakes
Guide trick-or-treaters to your door with creepy skeletal hands reaching from the ground.
Materials: Plastic skeleton hands, wooden dowels, black spray paint.
Tools: Hot glue gun.
Steps:
-
Spray dowels black.
-
Attach hands to dowels with hot glue.
-
Stake them along your pathway.
9. Spider Egg Sacs
This one is sure to creep out your guests!
Materials: White stockings, cotton batting, plastic spiders, fishing line.
Tools: Hot glue gun, scissors.
Steps:
-
Fill stockings with batting to form a sac.
-
Glue spiders onto the outside.
-
Tie the end and hang with fishing line.

Part 3: Advanced DIY Halloween Decor Projects
If you’re ready to go all out, these advanced builds will transform your space into a full-blown haunted attraction. They take more time and effort but the results are unforgettable.
10. Coffin Coffee Table
Double as decor and furniture with this standout build.
Materials: Plywood sheets, hinges, screws, black paint.
Tools: Circular saw, drill, measuring tape, sandpaper, paintbrush.
Steps:
-
Cut plywood into coffin shape.
-
Assemble with screws.
-
Sand edges smooth.
-
Paint black and distress with gray.
-
Attach hinges for a functional lid.
11. Animated Ghost Prop
Bring your yard to life with motion.
Materials: PVC pipe, motor (oscillating fan or wiper motor), fabric, LED lights.
Tools: Drill, hot glue gun, saw.
Steps:
-
Build PVC frame.
-
Attach motor to create movement.
-
Drape fabric for ghost body.
-
Add glowing LED eyes.
12. Haunted Mirror
A chilling illusion piece that looks like a normal mirror until you see the surprise.
Materials: Two-way mirror film, old frame, spooky photo print, LED light strip.
Tools: Scissors, glue, craft knife.
Steps:
-
Apply two-way film to glass.
-
Mount photo behind glass.
-
Backlight with LEDs.
-
Frame and hang in dim light.
13. Giant Spider Web with Spider
Turn your porch or lawn into a web of nightmares.
Materials: Rope or thick twine, plastic spider, hooks or nails.
Tools: Scissors, ladder.
Steps:
-
Anchor rope in web pattern.
-
Tie cross-sections to complete web.
-
Position giant spider at the center.
Final Tips for DIY Halloween Decor
-
Safety First – Always test lighting and props for electrical safety. Keep walkways clear.
-
Weatherproofing – Use sealant sprays and sturdy materials for outdoor decor.
-
Storage – Invest in bins to protect decorations for future years.
-
Personal Touches – Mix store-bought with DIY to balance effort and effect.
DIY Halloween decor isn’t just about saving money — it’s about unleashing your creativity and making memories. Whether you’re stringing up simple paper bats or building a full animated ghost, every project adds a layer of magic to your Halloween setup.
So grab your glue gun, gather some supplies, and get crafting. This year, your home won’t just be decorated — it’ll be unforgettable.