Why Your Hot Water Tank Matters
Before Hot Water Tank Repair… What is a Hot Water Tank and How Does it Work?
At its core, a hot water tank, also known as a storage water heater, is a straightforward appliance: an insulated tank that heats and stores a specific volume of water, typically between 30 to 80 gallons. A vertical “dip tube” sends cold water to the bottom of the tank to be heated. As the water heats, it rises to the top, where it’s drawn out through the hot water outlet pipe to your faucets and appliances.
The heating mechanism is what differentiates the two primary types. An electric water heater uses one or two internal heating elements—large, screw-in metal rods that function like the coils in an electric kettle. A thermostat monitors the water temperature, switching the elements on when it drops below a set point. A gas water heater, conversely, uses a gas burner at the bottom of the tank. A control valve regulates the gas flow to the burner, which is ignited by a pilot light or an electronic ignition system. Fumes from combustion are safely vented out of your home through a chimney or side wall vent.
Tank vs. Tankless: Understanding Your System (and Why This Guide Focuses on Tank Water Heaters)
While this guide focuses on traditional tank water heaters, it’s helpful to know the alternative: the tankless water heater. As the name implies, these units have no storage tank. Instead, they heat water on demand as it flows through the unit. When you turn on a hot water tap, cold water travels through a pipe into the unit, and either a gas burner or an electric element heats the water instantaneously.
Tankless systems are more energy-efficient because they don’t expend energy keeping a large volume of water hot 24/7. However, their initial installation cost is significantly higher, and their repair procedures are often more complex, typically requiring a certified technician. Tank water heaters are far more common in homes across the country, and their simpler mechanics make many troubleshooting and maintenance tasks accessible to a DIY-minded homeowner. That’s why we’re focusing on them here—to give you the most practical, hands-on knowledge for the system you most likely have. If you perform routine maintenance, a water heater’s lifespan can last 10 to 12 years, and a tankless water heater can function for up to 20 years.
The New Homeowner’s Advantage: Why Understanding Your Hot Water Heater is Crucial
As a new homeowner, you have a unique opportunity to start fresh. You didn’t live with the slow decline of the previous unit; you’re starting with a clean slate. Understanding your hot water heater from day one allows you to establish a baseline for its performance. Is the water always hot enough? Does it make strange noises? How long does it take to recover after a long shower?
Knowing these details helps you spot problems early before they escalate into catastrophic failures. A small, slow leak can go unnoticed for months, causing water damage and mold, but an informed homeowner knows to perform regular visual inspections. Understanding your system also means you won’t be caught off guard. When an issue arises, you’ll have a foundational knowledge that helps you either tackle the problem yourself or have a more informed conversation with a professional, ensuring you get fair service and pricing.
Empowerment Through Knowledge: Saving Money and Extending Lifespan with DIY Know-How
Knowledge is power, and in homeownership, it’s also money saved. The cost of a professional plumbing visit can be substantial, with national average repair costs for water heaters ranging between $294 and $599. Many of the most common issues, however, are surprisingly simple to fix. Tasks like flushing sediment, testing a heating element, or relighting a pilot light are well within the capabilities of a careful homeowner.
Beyond immediate repair savings, proactive maintenance is the key to longevity. A well-maintained water heater runs more efficiently and lasts significantly longer. Simple annual tasks can prevent the buildup of corrosive sediment, ensure safety features are functional, and catch failing parts before they cause a full system breakdown. Considering that water heater failures cost an average of $4,444 per incident after the deductible, an hour or two of your time each year is an incredible investment.
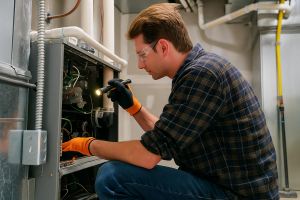
Safety First: Essential Precautions for Working with Water Heaters
Before you pick up a single tool, your number one priority must be safety. Water heaters combine water, high pressure, electricity or natural gas, and potentially scalding temperatures. Approaching any task without the proper precautions can lead to serious injury or property damage. This section is not optional; it is the mandatory first step for any interaction with your hot water tank.
Identifying Your Water Heater Type: Gas Water Heater vs. Electric Water Heaters
The first step in safe operation is knowing what you’re working with. The safety procedures for gas and electric models are critically different.
- Electric Water Heaters: Look for a thick electrical cable, usually in a metal conduit, entering the top or side of the unit. You will see one or two access panels on the side of the tank, behind which are the thermostats and heating elements. There will be no gas lines or vent pipes. The global electric water heater market is substantial, valued at USD 14.67 billion in 2023, reflecting their widespread use.
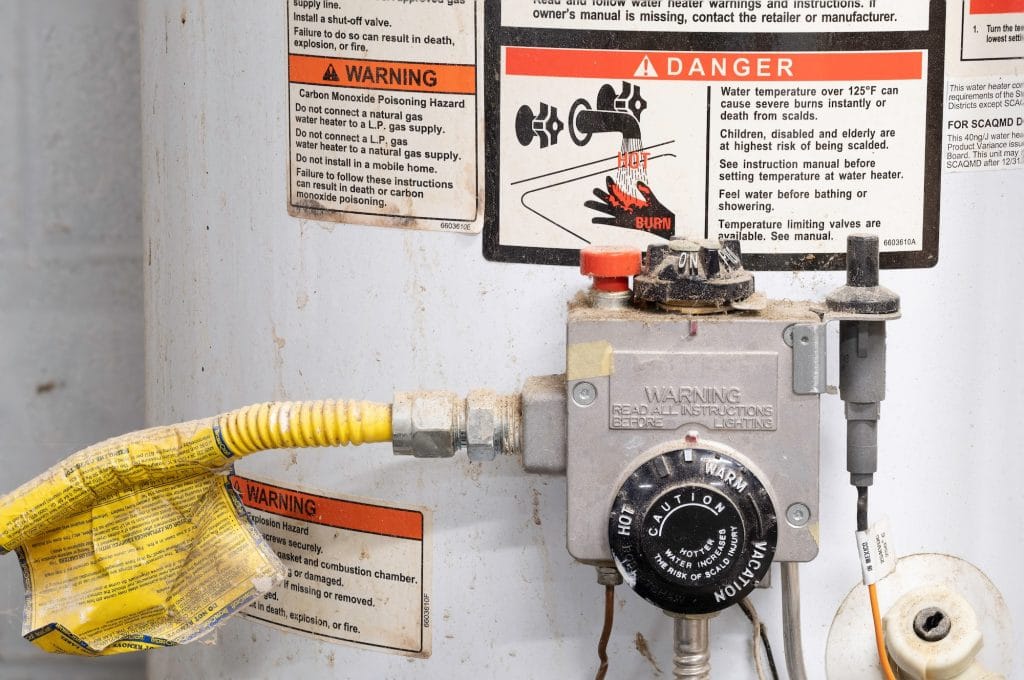
- Gas Water Heater: A gas model is identifiable by several key components. You will see a gas supply line (often a flexible, yellow or black pipe) connected to a gas control valve near the bottom of the tank. From this valve, a smaller tube will run to the burner assembly underneath the tank. You will also see a metal vent pipe (chimney) coming from the top of the unit to exhaust combustion gases.
Correctly identifying your unit is crucial because the shutdown procedures are entirely different.
Shutting Off the Supply: How to Safely Turn Off Power (circuit breaker) or Gas (gas supply, pilot light)
Never attempt any repair or maintenance without first cutting off the energy source.
- For Electric Water Heaters:
- Locate your home’s main electrical panel (the circuit breaker box).
- Find the circuit breaker that controls the water heater. It should be a double-pole breaker (two switches linked together) and may be labeled “Water Heater,” “Hot Water,” or “WH.”
- Firmly switch the breaker to the “OFF” position.
- As a redundant safety check, use a non-contact voltage tester near the wires at the water heater itself to confirm the power is completely off before touching any electrical components.
- For a Gas Water Heater:
- Find the gas shut-off valve on the gas supply line leading to the water heater’s control valve. The valve handle is typically a small lever.
- Turn the handle a quarter-turn so it is perpendicular (at a 90-degree angle) to the pipe. This is the “OFF” position.
- Turn the main gas control knob on the water heater itself to the “OFF” position. This will extinguish the pilot light. If you smell gas after shutting it off, leave your home immediately and call your gas utility company from a safe distance.
Draining the Water Heater: When and How to Safely Depressurize and Empty Your Tank (main water supply)
Draining the tank is necessary for many repairs, such as replacing heating elements or the drain valve itself, and is the core of routine flushing.
- Shut Off the Energy: Follow the steps above to turn off the electricity or gas. For safety, wait several hours for the water in the tank to cool to avoid scalding.
- Shut Off the Water: Locate the cold water shut-off valve, typically on the cold water pipe entering the top of the tank. Turn the handle clockwise until it stops. This prevents new water from entering the tank as you drain it.
- Depressurize the System: Open a hot water faucet somewhere in your house (like a bathtub). You’ll hear a brief spurt of water, then it will slow to a trickle. This relieves pressure in the system and allows air to enter, preventing a vacuum from forming and stopping the tank from draining properly.
- Connect a Hose: Attach a standard garden hose to the drain valve located near the bottom of the water heater tank. Run the other end of the hose to a floor drain, a utility sink, or outside, ensuring the exit point is lower than the tank itself.
- Open the Valve: Open the drain valve using a flathead screwdriver or a handle, depending on the type. Water will begin to flow out. The initial flow might be slow or chunky if there’s heavy sediment. Be patient; it can take 15 to 45 minutes to drain completely.
Understanding Potential Hazards: Carbon Monoxide, Scalding, Electrical Shock (carbon monoxide detector, safety precautions)
Beyond the immediate mechanics, be aware of these three significant hazards:
- Electrical Shock (Electric Models): Even after turning off the breaker, capacitors in some electronic controls can hold a charge. Always use a multimeter or voltage tester to confirm there is no power before touching wires. Never work on electrical components while standing in water.
- Carbon Monoxide (Gas Models): Carbon monoxide (CO) is a colorless, odorless gas produced by incomplete combustion. It is lethal. Ensure your gas water heater’s venting is intact, unobstructed, and properly sloped. Every home with gas appliances must have working carbon monoxide detectors installed near sleeping areas.
- Scalding: Water heater thermostats can be set as high as 140°F (60°C) or more, which can cause third-degree burns in seconds. Always allow the tank to cool for several hours after shutting it off before draining. When refilling and turning the unit back on, be cautious with the first hot water that comes from the tap.
Basic Personal Protective Equipment (PPE) for DIY Tasks
Protecting yourself is simple and non-negotiable. Always use the following PPE:
- Safety Glasses: Protect your eyes from unexpected splashes of hot water, debris, or rust particles.
- Work Gloves: Sturdy gloves protect your hands from hot pipes, sharp metal edges, and general grime. Insulated or waterproof gloves are even better.
- Closed-Toe Shoes: Protect your feet from dropped tools or hot water spills.
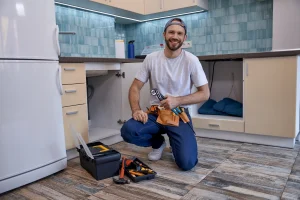
Your DIY Toolbox: Essential Tools for Hot Water Tank Repair & Maintenance
Having the right tools on hand transforms a frustrating ordeal into a manageable task. You don’t need a professional plumber’s entire truck, but a small, dedicated set of tools will equip you for the most common maintenance and repair jobs.
General Plumbing Tools Every Homeowner Needs (wrenches, pipe dope, Teflon tape)
This core set of tools is useful not just for your water heater, but for plumbing tasks all over your home.
- Adjustable Pipe Wrench (x2): You’ll need two of these. One holds a fitting or pipe steady while the other turns the connecting piece. This prevents you from twisting and breaking pipes.
- Adjustable Crescent Wrench: Perfect for smaller nuts and bolts found on access panels or mounting brackets.
- Channel-Lock Pliers: Their adjustable jaws make them incredibly versatile for gripping various-sized pipes, nuts, and fittings.
- Teflon Tape (Pipe Thread Seal Tape): This thin white tape is wrapped around the threads of pipes and fittings before they are screwed together. It creates a watertight seal and prevents leaks.
- Pipe Dope (Pipe Thread Sealant): A paste-like version of Teflon tape. It lubricates the threads for easier assembly and helps create a durable, leak-proof seal. It’s often used in conjunction with or instead of tape, especially on gas lines.
Diagnostic Tools for Troubleshooting (multimeter for electric models, thermometer)
To accurately diagnose a problem, you need to be able to test and measure.
- Multimeter: This is an absolutely essential tool for anyone with an electric water heater. It allows you to safely test for voltage (to confirm power is off) and check the continuity of heating elements and thermostats to see if they have failed.
- Digital Thermometer: A simple kitchen or meat thermometer can be useful for checking the actual temperature of the water coming out of your tap. This helps you determine if your thermostat is set correctly or is malfunctioning.
Specific Tools for Maintenance (hose for flushing, anode rod wrench)
These tools are for specific, recurring water heater tasks.
- Garden Hose: A standard hose, at least 10-15 feet long, is necessary for draining and flushing the tank.
- Anode Rod Wrench: This is a specialized tool. An anode rod is screwed in very tightly at the factory. The wrench is a 1 1/16-inch socket attached to a long breaker bar, giving you the leverage needed to break it loose. Attempting this with a standard socket wrench is often an exercise in futility.
- Element Wrench: For electric models, this tool is specifically designed to fit the hexagonal base of the heating element for easy removal and installation.
Safety Gear for All Tasks (gloves, eye protection)
As mentioned in the safety section, this isn’t just a suggestion—it’s a requirement for any work.
- Safety Glasses: Non-negotiable. Protects your eyes from mineral deposits, rust flakes, and water spray.
- Sturdy Work Gloves: Protects your hands from hot surfaces, sharp edges, and grime.
Understanding Your Hot Water Tank: A Quick Anatomy Lesson
To effectively troubleshoot and repair your hot water heater, you need to know its basic components and their functions. Think of this as a quick tour “under the hood” of the appliance that provides your daily comfort.
Key Components of a Tank Water Heater
While gas and electric models have different heating systems, they share many fundamental parts:
- The Tank: The main body of the unit is a heavy steel tank designed to withstand high pressure. It’s lined with a layer of glass or polymer to prevent corrosion and wrapped in insulation to keep the water hot.
- Dip Tube: A long plastic tube that carries cold water from the inlet at the top of the tank down to the bottom. This ensures the coldest water is heated first and prevents it from immediately mixing with the hot water at the top.
- Hot Water Outlet: The pipe at the top of the tank that delivers hot water to your home.
- Anode Rod: A sacrificial rod, typically made of magnesium or aluminum, that is screwed into the top of the tank. It protects the steel tank from rust through an electrochemical process, corroding itself instead of the tank lining. It is one of the most critical components for extending the tank’s life.
- Temperature & Pressure (T&P) Relief Valve: A critical safety device. If the temperature or pressure inside the tank gets too high, this valve automatically opens to release water and relieve the pressure, preventing a potential explosion. It has a small lever for manual testing.
- Drain Valve: Located near the bottom of the tank, this valve is used to empty the water for maintenance, flushing, or replacement.
- Thermostat(s): This device regulates the water temperature. Electric models often have two (one for each heating element), while gas models have one integrated into the gas control valve.
Electric-Specific Components:
- Heating Elements: Screw-in metal rods that heat the water directly. Most residential tanks have an upper and a lower element that work in sequence.
Gas-Specific Components:
- Gas Control Valve/Thermostat: The “brain” of a gas heater. It controls gas flow, regulates temperature, and houses the pilot light assembly.
- Burner Assembly: Located at the bottom of the tank, this is where the gas is burned to heat the water.
- Thermocouple: A safety sensor that sits in the pilot flame. It detects the heat of the pilot and allows the main gas valve to open. If the pilot light goes out, the thermocouple cools down and shuts off the gas supply.
- Vent/Flue: A pipe or chimney that safely directs exhaust gases out of your home.
Troubleshooting Common Hot Water Tank Problems: Diagnose the Issue
When your hot water goes out, it can feel like a major crisis. But with a systematic approach, you can often diagnose the problem yourself. The key is to start with the simplest solutions first and work your way toward more complex issues.
No Hot Water or Not Enough Hot Water (troubleshooting, heating elements, gas supply, pilot light, circuit breaker, dip tube)
This is the most common complaint. The cause depends entirely on your water heater type.
- For Electric Water Heaters:
- Check the Circuit Breaker: The first and easiest check. Go to your electrical panel and see if the water heater’s breaker has tripped. If it has, reset it once. If it trips again immediately, there’s a more serious electrical problem (like a shorted heating element) that needs investigation. Do not keep resetting it.
- Reset the High-Limit Switch: Each thermostat has a red reset button. Turn off the power at the breaker, remove the access panels, and press this button. If it clicks, it had tripped. This often happens if the water temperature gets too high.
- Test the Heating Elements: If you still have no hot water, a failed heating element is the most likely culprit. If you have lukewarm water that runs out quickly, the upper element may be working but the lower one has failed. Using a multimeter (with the power OFF), you can test each element for continuity. A reading of 10-30 ohms is typical; an infinite reading means the element is broken and needs replacement.
- For a Gas Water Heater:
- Check the Pilot Light: Look through the small viewing window near the bottom of the tank. You should see a small, steady blue flame. If the pilot light is out, that’s your problem.
- Check the Gas Supply: Ensure the gas shut-off valve is in the “ON” position (parallel to the pipe). Check other gas appliances in your home (like a stove) to confirm you have gas service.
- Faulty Thermocouple: If the pilot light won’t stay lit after you relight it, the thermocouple has likely failed. This is a common and inexpensive part to replace.
- For Both Types:
- Broken Dip Tube: If you get a brief blast of hot water that quickly turns lukewarm or cold, the dip tube might be broken or disintegrated. This causes cold inlet water to mix with the hot water at the top of the tank instead of being directed to the bottom.
Leaking Hot Water Tank: Identifying the Source of Leaks (leaks, fittings, T&P relief valve, water tank)
Water around your heater is a serious sign that requires immediate attention. The source of the leak determines the solution.
- Check the Plumbing Fittings: Look closely at the cold water inlet and hot water outlet pipes on top of the tank. Leaks from these fittings are common and can often be fixed by tightening the connection or replacing the Teflon tape/pipe dope.
- Inspect the T&P Relief Valve: Water may be dripping from the valve itself or its overflow pipe. The valve may have a weak seal or could be releasing pressure. Manually open and close the valve a few times to see if it reseats. If it continues to leak, it needs to be replaced.
- Examine the Drain Valve: The drain valve at the bottom can degrade over time. A leak here might be a slow drip or a steady stream. Sometimes tightening it with a wrench can help, but often the entire valve needs replacement.
- Look for Leaks from the Tank Itself: This is the worst-case scenario. If you see water seeping from the bottom of the tank jacket or from seams on the side, it means the inner tank has corroded and failed. Unfortunately, 95% of the time, the main reason people call about a water heater problem is leakage, which is often not repairable. A leaking tank cannot be repaired and requires immediate replacement of the entire water heater.
Strange Noises: Popping, Banging, Rumbling (sediment build-up, flushing)
Loud noises coming from your water heater are alarming, but they usually point to one specific cause: sediment build-up. Over time, minerals like calcium and magnesium in your water supply settle at the bottom of the tank, forming a hard, crusty layer. When the burner or lower heating element turns on, water gets trapped under this layer of sediment and boils, creating steam bubbles that pop and bang as they escape. This process is not only noisy but also incredibly inefficient, as the unit has to work harder to heat the water. The solution is a thorough flushing of the tank.
Discolored or Smelly Water: Addressing Water Quality Issues (water discoloration, sediment, anode rod)
If your hot water suddenly looks rusty or has a “rotten egg” smell, it’s a clear signal from inside your tank.
- Rusty or Brown Water: This is a classic sign of a failing anode rod. The rod has been completely consumed, and now the water is starting to corrode the inside of your steel tank. If you catch it early and replace the anode rod, you might save the tank. If left too long, the tank itself will rust through and begin to leak.
- Sulfur or “Rotten Egg” Smell: This smell is caused by sulfate-reducing bacteria that can thrive in the warm, low-oxygen environment of a water heater, especially in homes with well water. The bacteria react with the magnesium or aluminum anode rod, producing hydrogen sulfide gas—the source of the smell. Replacing the standard anode rod with a zinc-aluminum alloy rod and flushing the tank can often solve this problem.
Low Hot Water Pressure: When the Flow Isn’t Enough (water pressure, water flow, dip tube)
If the cold water pressure in your house is fine, but the hot water pressure is low everywhere, the issue is likely related to your water heater.
- Sediment Clogs: Pieces of sediment or scale can break loose from the bottom of the tank and get caught in the hot water outlet pipe, restricting water flow.
- Corroded Pipes: Older homes with galvanized steel pipes can have significant corrosion and scale buildup inside the pipes connected to the water heater, which can restrict flow.
- Kinked Connector: The flexible water lines connecting the tank to your home’s pipes can sometimes get kinked, restricting the flow.
Pilot Light Won’t Stay Lit (gas water heater, pilot assembly, thermocouples)
This is a frustrating issue unique to a gas water heater. You follow the instructions to relight the pilot, it lights up, but as soon as you release the knob, the flame goes out.
- Faulty Thermocouple: This is the most common reason by far. The thermocouple’s job is to signal to the gas valve that a flame is present. If it’s failing, it won’t send the signal, and the valve will shut off the gas as a safety measure. It might be dirty and need cleaning, or it might need to be replaced.
- Dirty Pilot Assembly: The tube that supplies gas to the pilot light can become clogged with dirt or debris, resulting in a weak, flickering flame that isn’t strong enough to heat the thermocouple properly. Cleaning the pilot orifice can resolve this.
- Drafts: A strong draft from a nearby window, vent, or even a poorly sealed flue pipe can blow the pilot light out.
Water Too Hot or Not Hot Enough (temperature control, thermostat)
If the water temperature is inconsistent or set incorrectly, the thermostat is the prime suspect.
- Thermostat Setting: The simplest check. Most thermostats have a dial. The recommended setting for safety and efficiency is 120°F (49°C). Someone may have accidentally changed it.
- Failing Thermostat: If you adjust the dial but the water temperature doesn’t change, or if the water is scalding hot regardless of the setting, the thermostat is likely malfunctioning and needs to be replaced. For electric models with two thermostats, they must be set to the same temperature to function correctly.
DIY Hot Water Tank Repairs: Step-by-Step Solutions
Once you’ve diagnosed the issue, you can move on to the repair. The following are some of the most common DIY-friendly repairs. Always remember to perform the safety shutdowns (power/gas and water) before beginning any work.
Basic Resets: Relighting the Pilot Light or Resetting the Circuit Breaker (pilot flame, electric models)
These are the simplest “repairs” and should always be your first step.
- Resetting the Circuit Breaker (Electric Models):
- Open your home’s main electrical panel.
- Locate the double-pole breaker for the water heater.
- If it’s in the middle or “tripped” position, push it fully to “OFF,” then back to “ON.”
- If it trips again, do not reset it again. This indicates a deeper electrical issue that needs professional diagnosis.
- Relighting the Pilot Light (Gas Models):
- Locate the instructions printed on the side of your water heater tank; procedures can vary slightly by manufacturer.
- Turn the gas control knob to the “OFF” position and wait 5 minutes for any residual gas to dissipate.
- Turn the knob to the “PILOT” position.
- Press and hold the knob or a separate red button down. This manually sends gas to the pilot assembly.
- While holding the button down, press the piezo igniter button (a red or black button that clicks) several times until you see the pilot flame ignite. If you don’t have an igniter, you’ll need to use a long lighter through the access opening.
- Continue to hold the pilot button down for a full 60 seconds after the flame is lit. This gives the thermocouple time to heat up.
- Slowly release the button. The pilot flame should remain lit.
- Turn the main control knob to the “ON” or a desired temperature setting. You should hear a “whoosh” as the main burner ignites.
Draining and Flushing Your Hot Water Tank: Removing Sediment Build-Up (flushing, sediment, sediment build-up)
Flushing your tank annually is the single most effective maintenance task you can perform to extend its life and improve efficiency.
- Safety First: Turn off the power or gas to the water heater. To avoid scalding, you can either let the tank cool for several hours or turn off the cold water supply a day before and use up the hot water in the tank.
- Shut Off Water Supply: Turn the handle on the cold water inlet valve clockwise to shut it off.
- Connect Hose: Attach a garden hose to the drain valve at the bottom of the tank. Run the other end to a safe drainage location.
- Open Hot Water Tap: Open a hot water faucet in a sink or tub on an upper floor. This allows air to enter the tank, preventing a vacuum.
- Open Drain Valve: Open the drain valve. The water will begin to flow out. It will likely be discolored and contain small chunks of sediment.
- “Scour” the Tank: To dislodge stubborn sediment, briefly open the cold water supply valve for 15-20 seconds a few times during the draining process. The burst of cold water will stir up the sediment at the bottom of the tank and help it flow out the drain hose.
- Continue Draining: Let the tank drain until the water runs clear.
- Refill: Close the drain valve and remove the hose. Leave the hot water faucet open elsewhere in the house. Slowly reopen the cold water supply valve. You will hear the tank starting to fill. Keep the faucet open until water flows steadily from it, ensuring all air has been purged from the tank and pipes.
- Restore Power/Gas: Once the tank is completely full, you can safely turn the electricity or gas back on. Never restore power to an electric water heater before it is full of water, as this will instantly burn out the heating elements.
What’s Next?
You’ve successfully navigated the essentials of your home’s hot water system. By following this guide, you have accomplished the crucial first steps of a proactive homeowner: understanding the mechanics of your water heater, recognizing the importance of safety, and learning to diagnose and address the most common issues. You are now equipped with the knowledge to troubleshoot everything from a lack of hot water to strange noises and leaks, and you have step-by-step instructions for fundamental maintenance tasks like flushing sediment.
This isn’t just about fixing problems; it’s about building confidence and taking control. You’ve learned that you don’t have to be powerless when an appliance acts up. You can save significant money on service calls and extend the life of your expensive equipment through simple, regular care.
Your immediate next steps are to put this knowledge into practice:
- Identify Your System: Go to your water heater right now. Determine if it’s gas or electric. Locate the power breaker or gas shut-off valve and the main water shut-off for the unit. Take a picture of the manufacturer’s label, which contains the model, serial number, and age.
- Assemble Your Toolkit: Review the tools list and gather the essentials. Having a dedicated kit with a multimeter, wrenches, and Teflon tape will prepare you for the future.
- Schedule Your First Maintenance: Put a reminder on your calendar one month from today to perform your first visual inspection. Check for any signs of leaks around the fittings and valves. Plan to do your first full tank flush within the next six months to establish a clean baseline.
By making these small, proactive efforts part of your regular home maintenance routine, you transform from a reactive homeowner into a prepared one, ensuring years of reliable hot water and the peace of mind that comes with it.