Why This Ultimate DIY Flooring Guide is Your Go-To Resource
Unlike fragmented advice scattered across the web, this guide consolidates everything a DIY homeowner needs into one place. We move beyond simple pros and cons lists to provide a holistic framework for your project. We address the critical decision-making factors that precede any purchase, offer a direct comparison of your options, and then provide detailed, step-by-step installation walkthroughs for each material. Our focus is on empowering you with the knowledge and confidence to select the right floor for your home and install it successfully yourself.
What You’ll Learn: From Selection to Full Installation
By the end of this guide, you will have a deep understanding of the unique characteristics of hardwood, laminate, vinyl, and bamboo flooring. You will learn how to assess your specific needs—from budget and lifestyle to aesthetics and maintenance—to make an informed choice. Most importantly, you will be equipped with a complete walkthrough for preparing your space and installing your new floor, transforming your vision into reality. We will cover tool requirements, subfloor preparation, cutting techniques, and finishing touches, ensuring you are prepared for every stage of the project.
Choosing Your Perfect Floor: Key Decision Factors for DIY Homeowners
Before you fall in love with a specific color or style, it’s essential to evaluate your flooring choice against a practical set of criteria. Answering these questions honestly will guide you to a floor that not only looks great but also performs perfectly for your unique circumstances.
Understanding Your Budget: Beyond Material Costs (Tools, Underlayment, Accessories, Potential Mistakes)
Your budget is more than just the price per square foot of the flooring material. A successful DIY project accounts for the total cost. Factor in underlayment or moisture barriers, which are often required. You’ll need transition strips for doorways and quarter-round or baseboard molding to finish the edges. Consider the cost of tools you may need to buy or rent, such as a miter saw, jigsaw, tapping block, or floor nailer. Finally, always add a 10-15% contingency for waste, cutting errors, and unexpected repairs. Thoughtful budgeting prevents surprise expenses and ensures you can complete the project without compromise.
Lifestyle & Durability Needs: Pets, Kids, High-Traffic Areas, and Scratch Resistance
Your daily life dictates the level of durability you need. A busy household with children and pets requires a floor that can withstand scratches, spills, and constant foot traffic. Consider scratch resistance (often indicated by the wear layer thickness in laminate and vinyl) and dent resistance. Hardwoods vary in hardness, while strand-woven bamboo is exceptionally durable. For high-traffic areas like hallways and living rooms, prioritize materials known for their resilience to avoid premature wear and tear.
Moisture Resistance & Room Suitability: Kitchens, Bathrooms, Basements, and Entryways
Water is the enemy of many flooring types. For moisture-prone areas like full bathrooms, kitchens, and basements, a waterproof or highly water-resistant material is non-negotiable. Luxury vinyl is the clear winner here, as it is typically 100% waterproof. While engineered hardwood and certain types of bamboo offer better moisture resistance than their solid counterparts, they are not ideal for areas with potential standing water. Laminate has improved, with many “water-resistant” options, but spills should still be wiped up promptly. Always match the material’s properties to the room’s function.
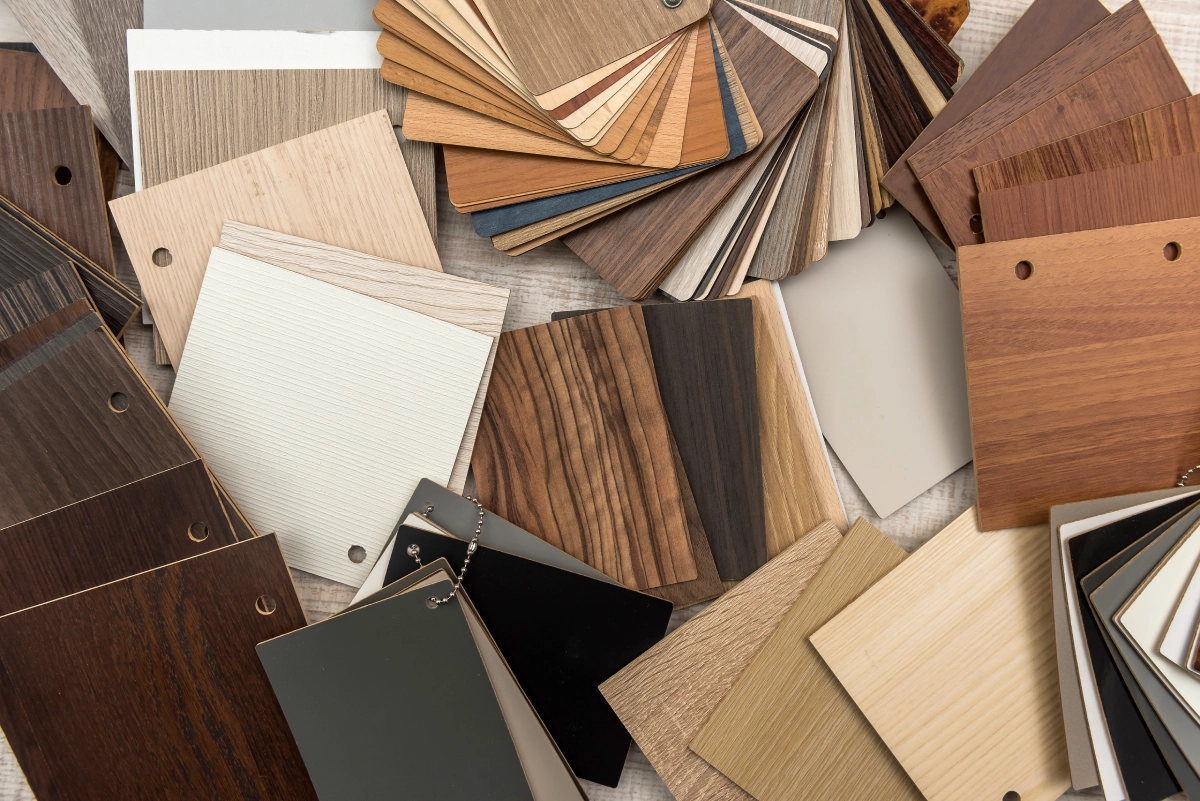
Aesthetics & Design Style: Matching Your Home’s Vision
Flooring is a dominant design element that sets the tone for your entire home. Consider your existing decor, color palette, and architectural style. Do you prefer the timeless, natural grain of hardwood? The hyper-realistic wood or stone look of modern laminate and vinyl? Or the unique, clean aesthetic of bamboo? Collect samples and view them in your home’s natural light at different times of the day. A floor that complements your overall vision will create a cohesive and inviting space.
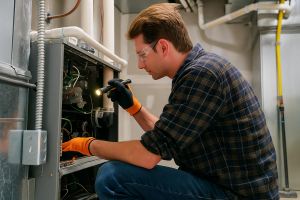
Ease of DIY Installation: Assessing Your Skill Level and Time Commitment
Be realistic about your skills, available tools, and the time you can dedicate to the project. Laminate and luxury vinyl plank (LVP) with click-lock systems are generally the most DIY-friendly options, designed for straightforward floating installations. Engineered hardwood and bamboo can also be installed as floating floors. Solid hardwood, which typically requires nailing or gluing, presents a higher degree of difficulty and may require specialized tools, making it a more challenging project for a novice.
Maintenance & Longevity Expectations: How Much Care Are You Willing To Give?
Consider the long-term commitment. Hardwood floors can last a lifetime but may require periodic refinishing. Vinyl and laminate are low-maintenance, typically requiring only regular sweeping and occasional mopping with a manufacturer-approved cleaner. Bamboo care is similar to hardwood. If you prefer a “set it and forget it” floor, a low-maintenance option like vinyl might be the best fit. If you value the ability to repair and refinish a floor to make it last for generations, hardwood is an excellent investment.
Environmental Impact & Sustainability: Making an Eco-Conscious Choice
For many homeowners, the environmental footprint of their materials is a key consideration. Look for products with certifications like FloorScore for low volatile organic compound (VOC) emissions, ensuring better indoor air quality. Hardwood from responsibly managed forests (indicated by FSC certification) is a sustainable choice. Bamboo is a standout in this category; as a rapidly regenerating grass, it is a highly renewable resource. Choosing sustainable materials extends beyond the floor and can influence other home choices, from using bamboo kitchenware to opting for bamboo toilet paper over traditional paper products.
Flooring Showdown: A Comparative Overview for Quick Decisions
Making a final decision can be tough. This side-by-side comparison distills the key characteristics of each flooring type to help you weigh the options based on what matters most to you.
Side-by-Side Comparison Table: Hardwood, Laminate, Vinyl, & Bamboo
| Feature | Solid Hardwood | Engineered Hardwood | Laminate | Luxury Vinyl (LVP/LVT) | Bamboo |
|---|---|---|---|---|---|
| Material Cost | High | Medium-High | Low-Medium | Low-Medium | Medium |
| DIY Friendliness | Difficult | Moderate | Easiest | Easiest | Moderate |
| Durability | Good-Excellent | Good | Good-Excellent | Excellent | Excellent |
| Water Resistance | Poor | Fair | Fair-Good | Excellent (Waterproof) | Fair |
| Maintenance | Medium (Refinishable) | Medium | Low | Lowest | Medium |
| Feel Underfoot | Solid, Warm | Solid, Warm | Hard, Can be loud | Softer, Quiet | Solid, Hard |
| Longevity | 50+ years (can be refinished) | 20-40 years | 10-25 years | 15-30 years | 20-50 years |
| Eco-Friendly | Good (with FSC cert.) | Good (uses less hardwood) | Fair | Poor-Fair | Excellent (Renewable) |
Key Metrics for Comparison:
- Cost: Laminate and vinyl offer the most budget-friendly entry points. Solid hardwood is the premium investment.
- Installation: For the true DIY beginner, the click-lock systems of laminate and LVP are unmatched in simplicity.
- Moisture: Vinyl is the undisputed champion for wet areas like bathrooms and basements.
- Durability: Strand-woven bamboo and high-quality laminate with a thick wear layer offer exceptional scratch resistance, while LVP excels at handling moisture and traffic. Hardwood’s durability depends on its Janka hardness rating.
- Longevity: Solid hardwood’s ability to be sanded and refinished multiple times gives it the longest potential lifespan, making it a generational investment.
Hardwood Flooring: Classic Beauty, Enduring Value
There’s a reason hardwood remains a benchmark for quality flooring. It offers unparalleled natural beauty, warmth, and character that can increase a home’s resale value. The hardwood market remains robust, with its market size estimated at $29.04 billion in 2023 and projected to grow.
What is Hardwood Flooring? (Solid vs. Engineered Hardwood Construction)
- Solid Hardwood: Each plank is milled from a single, solid piece of wood. It’s typically 3/4 inch thick and can be sanded and refinished multiple times over its lifespan. Its main drawback is its susceptibility to expansion and contraction with changes in humidity, making it unsuitable for below-grade installations like basements.
- Engineered Hardwood: This flooring is constructed in layers. A thin top layer (veneer) of real hardwood is bonded to a core of high-quality plywood or high-density fiberboard. This layered construction provides greater dimensional stability, making it more resistant to humidity changes and suitable for installation on any level of the home, including over concrete slabs.
Hardwood Pros & Cons for DIY Homeowners
Pros:
- Timeless Aesthetic: Adds warmth, elegance, and significant resale value to a home.
- Longevity: Solid hardwood can last for a century or more with proper care.
- Refinishable: Scratches and wear can be sanded out, allowing you to restore the floor to new condition.
- Variety: Available in numerous species (oak, maple, hickory), stains, and finishes. In fact, in a recent challenging market, hardwood was the only flooring category to report sales growth.
Cons:
- Cost: One of the most expensive flooring options, both in materials and potentially in tool rental.
- Difficult Installation: Solid hardwood typically requires a nail-down or glue-down installation, which is challenging for beginners.
- Susceptible to Moisture: Can warp, cup, or buckle in high-humidity environments. Not for bathrooms or basements.
- Prone to Scratches/Dents: Softer woods can be easily damaged by pet claws, high heels, or dropped objects.
Hardwood Selection: What DIYers Need to Know
- Species & Hardness: The Janka hardness scale measures a wood’s resistance to denting. Oak is a popular, durable mid-range option, while hickory and Brazilian cherry are much harder. Choose a hardness level that matches your lifestyle.
- Finish: Prefinished hardwood comes with a durable, factory-applied coating, simplifying installation. Unfinished hardwood is installed raw and must be sanded and finished on-site, a job best left to professionals.
- Plank Width: Wider planks create a more modern, expansive look, while narrower strips are more traditional.
- Grade: Wood grade (e.g., Clear, Select, No. 1 Common) refers to its appearance, including the number of knots and color variations.
DIY Hardwood Flooring Installation Walkthrough (Solid & Engineered)
1. Preparation & Acclimation (Crucial for Hardwood):
- Subfloor: Must be clean, dry, and perfectly flat. Sand down high spots and fill low spots with leveling compound.
- Acclimation: This is non-negotiable. Stack the opened boxes of hardwood in the installation room for at least 72 hours (or as per manufacturer’s instructions) to allow the wood to adjust to the home’s temperature and humidity.
- Underlayment: Roll out a moisture barrier or rosin paper over a wood subfloor.
2. Layout & First Row:
- Plan Your Layout: Run planks parallel to the longest wall. Measure the room’s width and adjust your starting row so the last row isn’t a tiny sliver.
- Chalk Line: Snap a chalk line for your first row, ensuring it’s perfectly straight and accounts for an expansion gap (typically 1/2 to 3/4 inch) along the walls. Use spacers to maintain this gap.
3. Installation:
- For Solid (Nail-Down): Face-nail the first row through the top of the plank near the wall. Subsequent rows are blind-nailed at a 45-degree angle through the plank’s tongue using a flooring nailer. Stagger the end joints of adjacent planks by at least 6 inches for stability and appearance.
- For Engineered (Floating): This is much easier. The planks lock together at the edges (click-lock system). Lay the first row with the tongue side facing the wall. Tap subsequent planks into place using a tapping block and mallet. No nails or glue are needed for the field of the floor.
4. Cutting & Finishing:
- Cuts: Use a miter saw for straight cuts at the end of rows and a jigsaw or table saw for ripping planks lengthwise or cutting around obstacles like vents.
- Final Row: You will likely need to rip the last row to fit, remembering to leave the expansion gap. You may need to use a pry bar to pull it tight and then face-nail it.
- Finishing Touches: Reinstall baseboards and quarter-round molding to cover the expansion gaps. Install transition strips in doorways.
Laminate Flooring: Budget-Friendly Style, Easy Installation
Laminate flooring is a synthetic product designed to mimic the look of natural materials like wood or stone. It’s a practical and affordable choice that has become incredibly popular for its durability and DIY-friendly installation, with a market size estimated to reach $4.13 billion by 2030.
What is Laminate Flooring? (Layered Construction: Wear Layer, Design Layer, HDF Core, Backer)
Laminate is a multi-layer sandwich:
- Wear Layer: A clear top coat made of aluminum oxide that protects against scratches, fading, and stains.
- Design Layer: A high-resolution photograph of wood, stone, or other material, giving the plank its appearance.
- HDF Core: A high-density fiberboard core that provides stability and impact resistance. This layer is susceptible to moisture damage if penetrated.
- Backer Layer: A stabilizing layer that provides a moisture barrier and prevents the plank from warping.
Laminate Pros & Cons for DIY Homeowners
Pros:
- Affordability: One of the most cost-effective flooring options available.
- Easy Installation: The click-lock floating floor system is designed specifically for DIYers.
- Durability: Highly resistant to scratches and fading, making it great for homes with pets and kids.
- Variety: Available in a vast range of styles, colors, and textures that realistically mimic more expensive materials.
Cons:
- Moisture Sensitivity: While water-resistant options exist, the fiberboard core can swell and be permanently damaged by standing water. Not suitable for full bathrooms.
- Not Refinishable: Deep scratches or chips cannot be sanded out. Damaged planks must be replaced.
- Feel & Sound: Can feel hard and sound hollow underfoot without a quality underlayment.
- Recent Market Trends: The market has seen some fluctuation, with laminate sales decreasing in 2024 as other categories compete.
Laminate Selection: What DIYers Need to Know
- AC Rating: The Abrasion Class (AC) rating (from AC1 to AC5) indicates durability. For general residential use, AC3 is a good standard. For high-traffic areas, consider AC4.
- Thickness: Planks range from 6mm to 12mm. Thicker planks feel more substantial underfoot, are more forgiving of subfloor imperfections, and often have more robust locking systems.
- Attached Underlayment: Many laminate products come with a pre-attached pad, which can save time and money during installation.
- Water Resistance: Look for products specifically marketed as “water-resistant,” which often feature tighter locking mechanisms and water-repellent coatings.
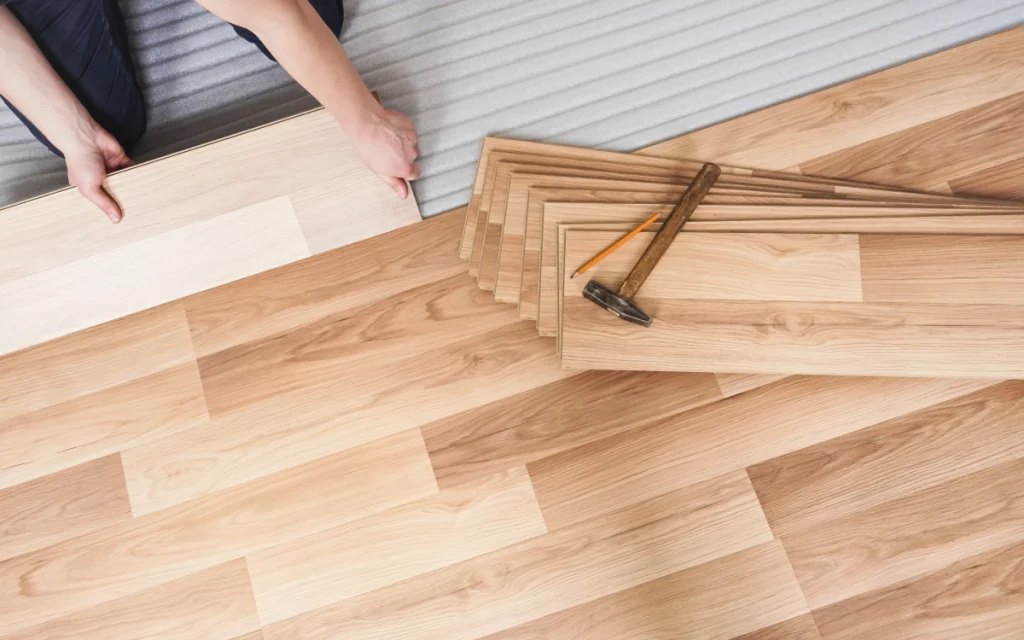
DIY Laminate Flooring Installation Walkthrough
1. Preparation & Underlayment:
- Subfloor: Must be clean, dry, and flat. Minor imperfections can be bridged by thicker laminate and a good underlayment.
- Acclimation: Let the unopened boxes of laminate lie flat in the room for 48-72 hours.
- Underlayment: If your laminate does not have an attached pad, roll out a separate underlayment. Use a vapor barrier over concrete subfloors.
2. Layout & First Row:
- Plan: Run planks parallel to the longest wall or main light source. Stagger joints by at least 8-12 inches between rows.
- Spacers: Place 1/4 to 3/8-inch spacers along the starting wall to create the necessary expansion gap.
- First Row: Lay the first row of planks, clicking them together at the short ends. Ensure this row is perfectly straight. You may need to cut the last plank to fit.
3. Building the Floor:
- Click-Lock System: Start the second row with the off-cut from the last plank of the first row (if it’s long enough) to create a natural stagger.
- Engage the Joint: Hold the new plank at a slight angle, insert its long-side tongue into the groove of the previous row, and then lower it flat. It should click into place.
- Tapping: Use a tapping block and mallet to gently tap the long and short joints tight for a seamless fit. Never hit the plank directly with the mallet.
4. Cutting Around Obstacles:
- Doorjambs: Use an undercut saw to trim the bottom of doorjambs so the flooring can slide underneath for a clean, professional finish.
- Irregular Shapes: Use a contour gauge or cardboard template to trace shapes around pipes or vents, then cut with a jigsaw.
5. Finishing:
- Last Row: Measure and cut the last row to width, remembering the expansion gap. Use a pull bar to click it into place.
- Molding: Remove the spacers and install baseboards or quarter-round to cover the gaps. Use transition pieces to bridge the laminate to other flooring types.

Vinyl Flooring: Waterproof Resilience, Versatile Options
Modern vinyl flooring has evolved far beyond the sheet vinyl of the past. Today, Luxury Vinyl Plank (LVP) and Luxury Vinyl Tile (LVT) offer stunningly realistic wood and stone looks with unparalleled durability and waterproof performance. The global vinyl flooring market is experiencing massive growth, projected to expand from $39.19 billion in 2024 to $66.94 billion in 2032.
What is Vinyl Flooring? (Distinguishing LVP, LVT, and Sheet Vinyl)
- LVP (Luxury Vinyl Plank): Mimics the look of hardwood planks. It comes in individual planks with realistic textures and bevels.
- LVT (Luxury Vinyl Tile): Mimics the look of stone or ceramic tile. It comes in square or rectangular tiles and can even be grouted for a more authentic look.
- Sheet Vinyl: Comes in large, flexible rolls. It’s a budget-friendly, seamless option but is generally more difficult for a DIYer to install perfectly than LVP or LVT.
Vinyl Pros & Cons for DIY Homeowners
Pros:
- Waterproof: LVP and LVT are typically 100% waterproof, making them the ideal choice for bathrooms, kitchens, laundry rooms, and basements.
- Durability: Highly resistant to scratches, dents, and stains. Perfect for high-traffic areas and homes with pets.
- Easy Installation: Most LVP and LVT products use a simple click-lock, floating-floor system.
- Comfort: Vinyl is softer and warmer underfoot than laminate or tile.
- Strong Market Growth: The LVT market in North America is particularly strong, with a market size of $5.94 billion in 2023.
Cons:
- Difficult to Repair: While durable, deep gouges are hard to fix. Individual planks can be replaced, but it can be a tricky process.
- Subfloor Imperfections: Thin or flexible vinyl planks can telegraph imperfections from the subfloor, meaning it must be very smooth.
- Fading: Can be susceptible to fading from direct, prolonged exposure to UV sunlight.
- Sustainability: Vinyl is a petroleum-based product, making it less eco-friendly than natural options like wood or bamboo.
Vinyl Selection: What DIYers Need to Know
- Wear Layer Thickness: This is the most critical factor for durability. Measured in mils (not millimeters), a 12-mil wear layer is good for residential use, while 20-mil or higher is excellent for heavy traffic.
- Core Type:
- WPC (Wood Plastic Composite): Softer and quieter underfoot.
- SPC (Stone Plastic Composite): More rigid and dent-resistant. Excellent for covering minor subfloor imperfections.
- Attached Pad: Many LVP/LVT products include an attached cork or foam underlayment for comfort, sound absorption, and easier installation.
DIY Vinyl Flooring Installation Walkthrough (Focus on LVP/LVT)
1. Subfloor Preparation:
- Clean & Smooth: The subfloor must be exceptionally clean, flat, and smooth. Any debris or bumps can show through the vinyl over time.
- No Acclimation Needed: Vinyl is dimensionally stable and typically does not require a long acclimation period, but always check the manufacturer’s guidelines.
- No Underlayment (Usually): Most LVP/LVT with an attached pad should not have an additional underlayment, as it can make the floor feel too spongy and stress the joints.
2. Layout & First Row:
- Planning: Follow the same layout principles as laminate, running planks along the longest wall and planning for a staggered pattern.
- Expansion Gap: LVP/LVT requires a smaller expansion gap than laminate or hardwood, typically around 1/4 inch. Use spacers against the wall.
3. Installation (Click-Lock):
- Cutting: Vinyl is easy to cut. For straight cuts, simply score the surface with a sharp utility knife and snap the plank. Use a miter saw for faster, cleaner cuts, or a jigsaw for complex shapes.
- Locking Mechanism: The process is identical to laminate. Angle the plank, connect the long edge, lower it, and tap the joints tight with a tapping block or rubber mallet.
- Flexibility: Because the planks are more flexible than laminate, ensure the subfloor is providing full support as you tap them together.
4. Finishing Touches:
- Molding: After removing the spacers, install baseboards or quarter-round to hide the expansion gap.
- Transitions: Use coordinating transition strips to connect to other flooring surfaces. Because vinyl is thin, you may need a reducer strip to transition to thicker flooring like carpet or tile.
Bamboo Flooring: Sustainable Strength, Modern Style
Bamboo flooring has emerged as a popular, eco-friendly alternative to traditional hardwood. It’s technically a grass, but when processed, it creates a flooring material that is exceptionally hard and durable. The global bamboo flooring market is seeing steady growth, expected to hit around $2.02 billion by 2034.
What is Bamboo Flooring? (Strand-Woven vs. Solid)
- Solid Bamboo (Vertical & Horizontal): Strips of bamboo are laminated together either vertically (narrow grain) or horizontally (wide grain, showing the bamboo “knuckles”). This type is comparable in hardness to oak.
- Strand-Woven Bamboo: Bamboo fibers are shredded, mixed with adhesive resins, and compressed under extreme pressure and heat. This process creates an incredibly dense and durable material, often two to three times harder than red oak.
Bamboo Pros & Cons for DIY Homeowners
Pros:
- Sustainability: Bamboo is a rapidly renewable resource, with some species growing several feet in a single day. This makes it a top choice for eco-conscious homeowners.
- Extreme Durability: Strand-woven bamboo is one of the hardest flooring materials available, highly resistant to dents and scratches.
- Modern Aesthetic: Offers a clean, contemporary look that differs from traditional wood grains.
- Affordability: Generally less expensive than traditional hardwood flooring.
Cons:
- Moisture Sensitivity: Like hardwood, bamboo can be damaged by excess moisture and humidity, making it unsuitable for wet areas.
- Hardness Varies: Natural, non-strand-woven bamboo is much softer. “Carbonized” bamboo (heat-treated for a darker color) is also softer than its natural counterpart.
- Cannot Be Refinished (Strand-Woven): The unique construction of strand-woven bamboo makes it nearly impossible to sand and refinish effectively.
- Quality Varies: The market has a wide range of quality. Low-quality bamboo can use adhesives with high VOCs. Look for reputable brands with FloorScore certification.
Bamboo Selection: What DIYers Need to Know
- Construction: For high-traffic areas, always choose strand-woven bamboo for its superior hardness.
- Color: “Natural” bamboo has a light, blonde color. “Carbonized” bamboo is heated to caramelize the sugars, creating a darker, amber tone, but this process softens the material slightly.
- Installation Type: Bamboo is available in tongue-and-groove profiles for nail-down or glue-down applications, as well as click-lock systems for floating installations, which are ideal for DIY projects.
The Broader World of Bamboo: A Sustainable Lifestyle Choice
Choosing bamboo flooring often opens the door to a more holistic, sustainable lifestyle. The same properties that make bamboo a great floor—strength, renewability, and a natural aesthetic—translate to other home goods.
- Kitchen: Bamboo countertops offer a durable and unique look, while bamboo kitchenware like cutting boards and utensils are naturally antibacterial and gentle on knives.
- Bed & Bath: The world of textiles has been revolutionized by bamboo fabric. When processed into fibers like bamboo viscose or the more eco-friendly bamboo lyocell, it creates incredibly soft and breathable materials. Bamboo sheets and bamboo fiber sheets are prized for their thermoregulating properties, keeping you cool in summer and warm in winter. They offer a silky feel distinct from traditional cotton or luxurious Egyptian cotton. The sustainability extends to everyday items like bamboo cotton swabs, bamboo toothbrushes, and even ultra-soft, biodegradable bamboo toilet paper.
- Furniture: Bamboo furniture is lightweight, strong, and brings a natural, minimalist appeal to any room.
DIY Bamboo Flooring Installation Walkthrough (Click-Lock Focus)
1. Preparation:
- Subfloor: Must be clean, dry, and flat, just like for hardwood.
- Acclimation: This is critical. Bamboo is very sensitive to ambient moisture. Acclimate the planks in their open boxes in the installation room for 72 hours or more