What Makes Something “Cheap / Budget” vs “Professional / High-End”
Before diving into specific categories, it helps to define what “cheap” vs “professional” means when it comes to DIY tools & materials.
|
Factor |
Cheap / Budget |
Professional / High-End |
|---|---|---|
|
Materials / Ingredients |
Lower-quality raw inputs, more fillers, less pigment (in paints), basic glue formulations, cheaper metal/steel in tools, less precise tolerances. |
Higher pigment load, premium binders/resins/additives, better metal/alloy/hardened steel, tighter tolerances, more refined chemical formulas. |
|
Manufacturing Quality / Tolerances |
More variation in finish, less attention to detail. Tools may have looser tolerances, alignment issues; paints may have uneven pigment dispersion. |
Higher control over manufacturing, better QC, more consistent product; tools are sharper, more durable, finishes more uniform. |
|
Ease of Use / Ergonomics |
Often less comfortable handles, simpler packaging, less refined applicators, adhesives might be messier or have unpleasant smell, short open time or awkward set-ups. |
Better ergonomics, better packaging, better applicators (brushes, nozzles, trigger guns), longer working/open time, more forgiving formulas. |
|
Durability & Longevity |
Suited for light use, often degrade faster (peel, fade, crack, wear), lower resistance to environmental stress (moisture, UV, temperature changes). |
Designed for long use, better resilience, higher warranties or rated life, withstands abuse & environment. |
|
Finished Product Quality |
May look good from a distance; details (finish, bonding, smoothness) might be imperfect; more maintenance needed. |
More polished finish, better bonding, fewer defects visible; higher confidence in structural integrity. |
|
Cost Over Time |
Lower initial cost, but may cost more in rework, more coats of paint, more frequent replacement. |
Higher upfront cost but often less cost per year of use, fewer repairs/replacements, less waste. |
Comparison by Material / Tool Type
Below I break down differences among several common categories: glues/adhesives, paints/coatings, basic hand tools / power tools, and other materials. For each I’ll compare budget vs pro, then show product examples.
1. Glues & Adhesives
What to Look For
-
Bond strength (tensile, shear, peel)
-
Open time / working time (how long before glue sets)
-
Water / moisture / weather resistance
-
Clamping or curing time
-
Clean up (ease of removing squeeze-out, safety, odor)
-
Compatibility with materials (wood, metal, plastic, etc.)
Cheap vs Professional: Key Differences
|
Feature |
Cheap Glues |
Professional Glues |
|---|---|---|
|
Formulation / Ingredients |
More filler, less expensive base resin, possibly fewer additives to improve durability or weather resistance. Sometimes weaker adhesives in moisture or temperature extremes. |
Better adhesives (e.g. higher grade PVA, polyurethane, epoxy, specialty adhesives), additives for water resistance, heat or cold resilience, adhesives that accept stain/paint well. |
|
Strength |
Adequate for light, non-critical joints, indoor use, non-structural applications. Will fail under stress or moisture. |
Much higher strength, rated for structural joints, outdoor exposure, more load bearing, better bonding even in difficult conditions. |
|
Working / Open Time |
Often short; can set too fast (or too slow with cheap formulas). Less forgiving. |
Designed open time to allow alignment, clamping, adjustments; better controlled cure times. |
|
Finish / Clean Up |
May have visible glue lines; more difficult to sand or stain cleanly; squeeze-out sometimes leaves more mess; odor or toxicity may be higher. |
Cleaner glue lines, easier cleanup, better matched color or transparency, formulated to accept finishes, less odor, safer options. |
|
Durability |
Less long-term resistance; glue may degrade over years, especially under moisture, heat, UV. |
Designed for longevity; rated for water resistance, temperature/humidity cycling; better warranties. |
Product Examples & Reviews
Here are some glue / adhesive product picks (professional and mid/high quality), plus what reviews/users say:


Below are some highlights:
-
Titebond III Ultimate Wood Glue (Pro): Very high PSI (tensile strength), waterproof (ANSI/HPVA Type I), longer open time, very strong bond. Used by woodworkers for furniture and outdoor work. More costly per ounce, but in many tests (like Pro Tool Reviews) Titebond III is often top performer.
-
Titebond II Premium Wood Glue: Slightly less than Type I waterproof, but still very good performance, common professional choice.
-
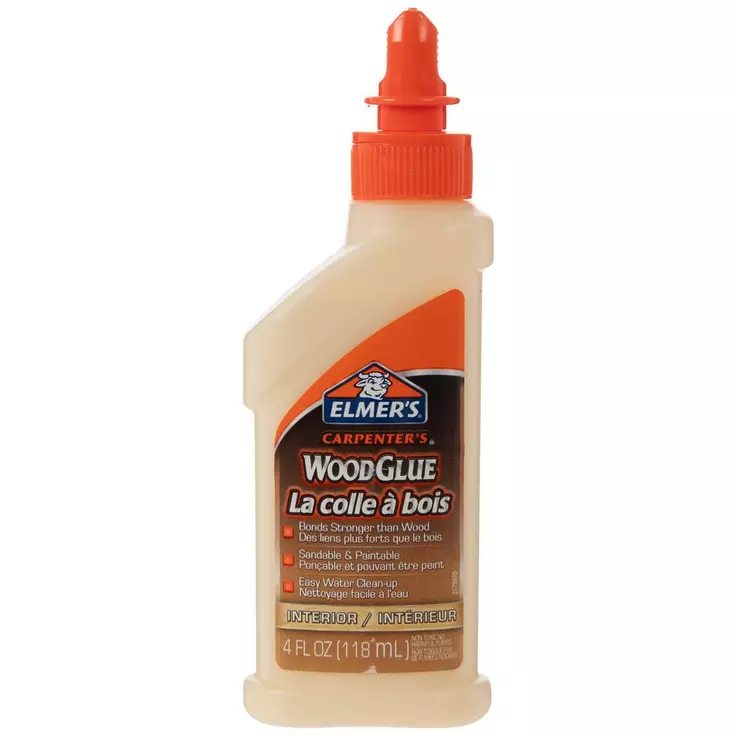
Elmer’s Carpenter’s Wood Glue (Budget): Very affordable, good for indoor work, light projects, non-structural furniture, crafts. Many users say it’s “good enough” for non-extreme conditions. But not great for outdoor exposure or heavy loads. Users in woodworking communities often say “Elmer’s works fine for general use, but if it’s a project that has moisture or load, go with Titebond II or III.”
-
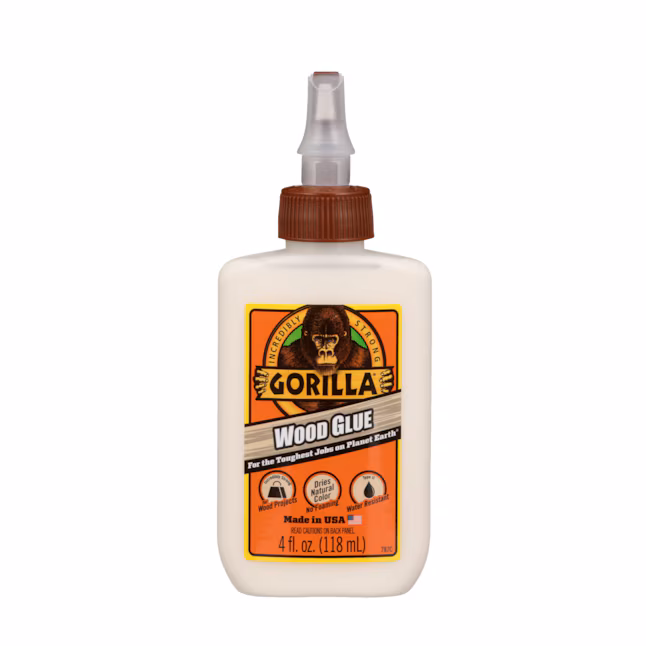
Gorilla Wood Glue: Middle ground; water resistant (Type II), strong bond, good reviews. Not quite Type I waterproof but much better than basic budget PVA.
-
DAP Weldwood Professional Wood Glue: Type II, fast setting. Users report good performance when stainable finish is needed (important for visible joints).
-
Grizzly Xpress Polyurethane Adhesive: Polyurethane adhesives are more expensive, more advanced; offer strong bond, water and environment resistance, but more challenging to work with (moisture activation, expansion, clamping).
-
For glue guns: Surebonder Professional HE‑750W Glue Gun vs budget glue gun like Ad Tech High‑Temp Glue Gun. The professional one has better temperature control, heavier duty components, more reliable nozzles, longer lifetime; budget ones often underperform after many uses, may have uneven heating, inconsistent glue flow.
Real-user feedback & Case Studies
-
Reddit threads among woodworkers often rank Titebond II/III glue far above basic white glues; many say “budget glue works for kids’ crafts but for furniture / cabinets / exterior you’re asking for trouble with budget.”
-
ProToolReviews’ guide to Best Wood Glue shows some budget options are acceptable, but pro-grade glues (e.g. Titebond III, Gorilla) provide greater bond strength, better water resistance, better open time.
2. Paints & Coatings
Key Criteria
-
Pigment quality & load (how intense/true color is, how durable the color is)
-
Binder/resin quality (holds pigment, resists cracking/peeling)
-
VOCs, odor, environmental safety
-
Coverage / hiding power (how many coats needed)
-
Finish / smoothness / leveling
-
Durability vs exposure (sun, moisture, abrasion)
-
Color retention / fade resistance
Cheap vs Professional: What’s Different
|
Feature |
Cheap / Budget Paints |
Professional / High-End Paints |
|---|---|---|
|
Ingredients |
Lower pigment concentration; cheaper fillers/fillers that reduce hide; cheaper binders; possibly high VOC or less stable under UV. |
High pigment, superior resins, additives for durability (UV, alkali, mildew resistance), better quality control. |
|
Coverage / Number of Coats |
Often need 2-4 coats for uniform coverage, especially with bold colors or over dark surfaces. |
Often 1-2 coats suffice; better hide even with challenging colors. |
|
Finish & Smoothness |
May show brush marks, roller stipple, uneven sheen; may not level well. |
Better flow, leveling, more consistent sheen, smooth finish even on trim and detailed surfaces. |
|
Durability |
Prone to fading, chipping, peeling, and wear especially under high traffic, moisture, or exterior exposure. |
Better resistance; longer service life; can better stand environmental stresses. |
|
Cost per Square Foot Over Time |
Though unit price is lower, total cost including labor/time + repainting tends to be higher. |
Higher upfront cost but lower total cost over lifespan. |
What People Say
-
From Goedeck Decorating article: budget paints often use lower quality pigments, resins, which leads to poor performance, more coats needed, color fading, poor finish.
-
From Right Touch Painting: cheap paints have low solid content, less resistance to UV, moisture; premium paints resist fading, peeling, hold up better. Also fewer coats required which saves labor & cost.
-
“Why using cheap paint costs you more” article argues that though cheap paint is low cost, needing more coats + earlier repaint makes it more expensive over lifespan.
Examples of Paints & Tools (Budget & Pro)
While I didn’t search deeply for high-end paint lines here in the product module, some tools that affect how well paint is applied are important: quality brushes/rollers, sprayers vs cheap rollers. Even a high-end paint will look bad with poor tools.
-
For instance, a quality roller cover (dense nap, with good weave) ends up laying paint more smoothly, with fewer lint or texture issues than cheap foam or low-nap rollers.
-
Also high-end spray guns cost more but can deliver more even coats, less overspray, more control.
3. Hand Tools & Power Tools (Basic Tools)
Tools are critical. Even with high-quality materials, a cheap tool can ruin finish or make work harder, slower, dangerous. Conversely, premium tools can make big difference in speed, precision, comfort, safety.
Key Attributes
-
Material / build (steel quality, hardened surfaces, heat treatment, plating)
-
Precision / tolerances (how straight, sharp, accurate)
-
Ergonomics (grip, weight, vibration control)
-
Power / speed / control (for power tools: motor quality, overheating, durability)
-
Safety features (guards, switches, reliability)
-
Maintenance / parts / lifespan
Cheap vs Professional Differences
|
Feature |
Cheap Tools |
Professional Tools |
|---|---|---|
|
Build & Material |
Thinner steel, softer metals, less durable; plastic parts may be more brittle, less reinforced. |
Strong steel, hardened parts, higher quality bearings, better insulation, plated parts to resist rust, etc. |
|
Precision / Finish Work |
Edges not perfectly straight; blades lose sharpness sooner; basic calibration; more play, wobble. |
Sharp, precise; better alignment; tighter tolerances means cleaner cuts/fits. |
|
Ergonomics & Safety |
May be heavier, less balanced; less comfortable handles; fewer safety features; higher vibration or noise. |
Better handles, balanced weight, features like better guards, more reliable electric/cordless performance, vibration or noise suppression. |
|
Lifespan & Repairability |
Often replaced rather than repaired; parts may not be available; performance drops faster. |
Longer lifespans, often serviceable, spare parts, warranties. |
|
Cost vs Use-Case |
For occasional / light use, budget tools may suffice. But in more intense, repeated, or precision work, cost of poor tool shows up in mistakes, time wasted. |
More expensive, but you get time savings, better output, fewer mistakes, often better resale or longer term value. |
Examples & User Feedback
User forums, tool reviews, etc., often show that a high-end drill, saw, or plane can make precise cuts that fit tightly, whereas cheap ones cause tear-out, uneven cuts. For example, budget miter saws vs high-end ones: cheaper ones tend to drift over time; blades vibrate; precision suffers.
Also, with paint brushes, a cheap brush may shed bristles, leave brush strokes; premium ones hold more paint, lay more evenly, last longer (after cleaning).
Overall Pros & Cons Summary
Here’s a table summarizing the pros & cons for cheap / budget vs professional / high-end in DIY materials and tools.
|
Category |
Pros of Cheap / Budget |
Cons of Cheap / Budget |
Pros of Professional / High-End |
Cons of Professional / High-End |
|---|---|---|---|---|
|
Cost & Accessibility |
Low barrier to entry; readily available; sufficient for small or non-critical jobs. |
May fail in demanding conditions; more frequent replacements; often poor finish. |
Superior performance; durability; better results; less rework; often safer. |
Higher initial investment; can be overkill for simple tasks; sometimes more complex to use. |
|
Ease / Learning Curve |
Simpler tools may be more forgiving; cheaper glue/paint often simpler application (but maybe more coats). |
Might be harder to work with (e.g. cheap glue dries too fast or too slow, cheap paint levels poorly, cheap tools less precise). |
Professionals products often have features that help beginners once they understand them (better open time, better control, ergonomics). |
If you don’t know how to use them properly, you might not get full benefit; some advanced tools require maintenance; higher cost of errors. |
|
Finish & Durability |
Acceptable finish for casual or temporary use; budget for light duty; craft decor etc. |
Color fading, peeling, weak joints, poor aesthetics; more repair/repaint needed. |
Much higher finish quality; joints that hold; color and surface stability; more professional appearance. |
Requires good prep, care, sometimes more supplies; sometimes higher maintenance or cleaning. |
|
Long-Term Value |
Good if using rarely; minimal risk. |
Over time, replacement & repair may cost more; frustration and time lost. |
Often saves money per year of use; better satisfaction; project looks better & lasts longer. |
Deep Dive: How Differences Manifest in Real Projects
To illustrate the impact, here are some examples / scenarios, showing how choosing budget vs pro materials/tools affects the project.
Scenario A: Building a Wooden Outdoor Bench (Subject to Weather)
|
Aspect |
Using Cheap Glues / Paints / Tools |
Using Professional Grade Materials & Tools |
|---|---|---|
|
Glue |
Use of basic PVA wood glue or low-grade type II at best. Adhesive may degrade with moisture; glue line may fail or swell; peeling or joint separation after a season or two. |
Use of waterproof adhesive (Type I, e.g. Titebond III), possibly polyurethane glue for exterior, good clamping, properly sealed joints: better structural strength, resistance to weather, longer lifespan. |
|
Paint / Finish |
Budget exterior paint; thinner coats; less pigment; fade quickly in sun; peeling after UV exposure; may need repaint every few years. |
Use high-quality exterior paint with UV resistance, mildew resistance, good primers. Fewer coats, better adhesion, long-term color retention; better protection of wood. |
|
Tools |
Cheap saw / drill may drift, misalign; blade may dull fast; surfaces rough; fasteners poorly driven; joints misaligned. |
Using a good saw (sharp blade), proper drill, good fasteners, precise measuring tools: joints match, less tear-out, smoother finish, better structural integrity. |
After two years, likely the bench built with pro materials & tools will look much better, require less maintenance; bench with cheap materials may warp, peel, joints weaken.
Scenario B: Painting a Living Room / Interior Trim
|
Aspect |
Budget Paint & Brushes |
Pro Paint & Tools |
|---|---|---|
|
Paint Quality |
Budget paint may require 3-4 coats to cover dark walls; paint may not level well; brush marks or roller stipples show; flat finishes may be hard to clean; sheen may dull quickly. |
Premium paint with higher pigment, better resins, more colors & finishes; better hiding power, 1-2 coats likely; finish smoother; trims sharper; surfaces easier to clean; finish holds up longer. |
|
Tools |
Cheap roller covers shedding fibers; cheap brushes lose bristles; less control; drip-marks; clean up hard. |
High-quality brushes/rollers; good containment; tools that hold paint well, distribute evenly; easier cleanup; less waste; better control. |
In interior work, even though moisture / weather is less of a concern, the finish quality matters, especially in visible areas. Professionals often say that even mediocre paint applied with top brushes / rollers will look better than excellent paint applied with poor tools.
When Cheap Is “Good Enough” (or Better)
It’s not always the case that professional always wins. There are situations where budget materials or tools might suffice—or even be preferable:
-
Low-cost, low-use items: small craft projects, prototypes, occasional use, decorative items that aren’t heavily stressed or visible. Here, the savings may be more valuable than durability.
-
Learning / experimentation: when you’re practicing, trying techniques, before committing big money. Mistakes more affordable.
-
Budget constraints: sometimes your budget dictates using lower-cost options; in that case, knowing the limitations helps you plan.
-
Temporary works or throwaway items: if something is not meant to last, spending lots may not make sense.
But even then, choosing some mid-grade stuff, especially in critical areas (glue quality, tools that affect finish) often pays dividends.
Cost-over-Time & Total Value
While cheap costs less initially, the total cost of ownership / project can be higher due to:
-
Having to re-do parts (paint, finish, glue joints)
-
Using more material (extra coats, extra glue, filling, sanding)
-
Time lost (tool inefficiency, corrections)
-
Poor final presentation (which may reduce perceived value or satisfaction)
Whereas pro materials often cost more up front but require less time, fewer reworks, better durability, better resale or satisfaction value.
Tables Comparing Specific Attributes
Here are some side-by-side tables showing common attributes for budget vs pro in glues, paints, and tools.
Table 1: Glues & Adhesives Comparison
|
Attribute |
Budget / Entry-Level Glues |
Professional / High-End Glues |
|---|---|---|
|
Tensile / Shear Strength |
Lower; enough for light duty, indoor, non-load bearing |
Higher; rated for structural, heavy load, outdoor |
|
Water / Moisture Resistance |
Often limited; may swell, lose bond in wet environments |
Strong resistance; often waterproof or rated for water exposure |
|
Open / Working Time |
Short or unpredictable; may set too fast (makes alignment difficult) |
Designed working times; more forgiving; easier to clamp or adjust before cure |
|
Curing / Clamping Time |
Longer or very awkward; may require less clamp pressure but more cure time |
Better instructions, faster set or more manageable cure; stronger clamp hold during cure |
|
Finish / Visible Glue Line |
May show more; harder to sand or stain; may not accept paint well |
Invisible lines (matching woods), stain or paint compatibility; easier clean up |
|
Durability Over Time |
Degrades sooner; loss of bond possible; may suffer under environment stress |
More stable; less degradation, more predictable performance over years |
Table 2: Paints / Coatings Comparison
|
Attribute |
Budget Paints |
Professional Grade Paints |
|---|---|---|
|
Pigment Load / Color Accuracy |
Lower pigment content; colors fade, may not be true to swatch after drying |
High pigment content; better color accuracy; resist fading |
|
Coverage / Hide Power |
Need more coats; over dark surfaces often struggle |
Better hide; often excellent two-coat or even one-coat coverage for some colors |
|
Finish & Sheen Options |
Fewer finishes; flat or basic sheen; may not maintain sheen over time |
Wide variety (flat, eggshell, satin, semi-gloss, gloss), maintains finish, more uniform sheen |
|
Resistance to Environmental Stress |
More prone to peeling, mildew, UV damage, cracking |
Better additives; more resilient; longer lifespan, less maintenance |
|
VOC / Odor / Safety |
Possibly higher VOCs, more odor, less “green / safe” options |
Many pro lines offer low-VOC, better odor control, more eco / safe formulations |
Table 3: Tools & Application Tools Comparison
|
Attribute |
Budget Tools / Application Tools |
Professional / High-End Tools |
|---|---|---|
|
Blade / Cutting Edge Quality |
Dulls faster; poorer edge; more imperfections; less precise cuts |
Sharp, long holding edge; cleaner cuts; less tear-out, smoother surfaces |
|
Ergonomics / Comfort |
Handles may be rough; less comfortable grip; more vibration; fatigue quicker |
Better grip, balanced weight, possibly vibration suppression; more comfortable in long-use |
|
Precision / Calibration |
Less accurate; may drift; more play or slack in moving parts |
Tight tolerances; precise calibration; more reliable in repeated tasks |
|
Lifespan & Maintenance |
Wears out faster; fewer replaceable parts; cheaper materials fail earlier |
Longer lifespan; often serviceable; replacement parts; higher durability |
|
Cost per Use / Time Saved |
Slower work; more correction needed; time lost; more frequent replacement |
Faster, efficient work; less correction; better return on investment over time |
Specific Examples / Case Studies
Here are some real user or review-based comparisons that illustrate the differences:
-
Super glue comparison tests (Bob Vila etc.): Gorilla Super Glue Gel, 3M Scotch Super Glue Gel, Loctite etc. — these brands tend to score high in tests of bonding time, strength, ease of application, surface compatibility. Cheap generic super glues often have weaker bonds, more brittle, set too quickly or too messily.
-
Wood glue reviews: ProToolReviews lists “best wood glue” and compares a range. For example, Gorilla Wood Glue is noted for high bond strength, reasonable open time, and relatively low cost compared to some specialty glues. But glues like Titebond III outshine in outdoor, high-stress applications.
-
Paint performance articles (Goedeck Decorating, Right Touch Painting) elucidate that cheap paints fade/peel/require many coats, whereas pro paints give better hide, color retention, fewer repaintings.
Guidance: How to Decide What to Buy
Given these comparisons, here are guidelines to help decide when to invest in professional vs when budget is acceptable:
-
Define the project purpose / expected lifespan
If you want the result to last many years (furniture, cabinets, outdoor items), professional materials/tools almost always pay off. For temporary or purely decorative, budget may suffice.
-
Evaluate exposure to stress / environment
If project is interior, low moisture, low wear, budget paints/glues/tools may pass. If moisture, heat, UV, heavy wear, you need higher quality.
-
Check visible finish matters
If the surface will be seen/handled often (trim, furniture, visible joints), pro tools and materials matter more. If hidden or functional, lesser quality may be fine.
-
Consider cost of rework / maintenance
Always estimate not just initial cost but what happens if warranty fails, if finish degrades, or if joints fail. Sometimes spending more now saves more later.
-
Balance budget vs priority
You don’t need all professional gear. Prioritize what matters: glue strength for structural joints, paint quality for visible surfaces, good tools for precision work; maybe budget elsewhere (fasteners, paint tray etc.).
-
Try mid-grade / hybrid options
Often there’s a middle ground: materials/tools that are better quality but not ultra-premium price. These often give much of the benefit, fewer compromises.
Where to Buy High-Quality Products (Example Links)
Here are external links to some of the better products I listed above, plus places where people consistently find high-quality materials & tools. You can use these for your site or to recommend to readers.
-
Titebond III Ultimate Wood Glue — Professional grade, waterproof, high bond strength. Available at Rockler Woodworking, Home Depot, Lowes etc.
(See the product above in the carousel.)
-
Gorilla Wood Glue — Good quality, water-resistant, somewhat more affordable.
-
DAP Weldwood Professional Wood Glue — Especially good when needing stainable joints, Type II water resistance.
-
Surebonder Professional HE-750W Glue Gun — For heavier duty glue gun work (crafting, woodwork, etc.), better durability and temperature control.
-
For premium paints: While I don’t have a specific product from the list, look at brands like Sherwin-Williams (Duration, Emerald), Benjamin Moore (Aura, Regal), Behr (Marquee), etc. These are higher in cost but have better reviews on hide, durability, resistance to environmental factors. You can refer to painting supply stores like Sherwin-Williams, local trade stores, or online retailers like Paint Supply stores or Home Depot/Lowes pro lines.
Why Professional Grade Is “Better” (Even If More Expensive)
To sum up, here are core reasons why professional grade materials & tools tend to outperform budget ones—beyond just “it costs more”.
-
Reliability & Consistency: Professional products are manufactured under tighter quality control. That means fewer surprises (e.g. glue cures too fast, paint color off, tool misaligned).
-
Longevity & Reduced Maintenance / Rework: You won’t need to fix, repaint, or replace parts as often. Over years, the cost per use or cost per year is lower.
-
Better Finish / Aesthetic Appeal: Especially important if visible. Clean joints, good coverage, smooth surfaces, fewer defects.
-
Time Saved & Less Frustration: Fewer mistakes, easier to work with materials/tools that behave predictably. For example, a glue with longer open time gives you room to adjust; a paint that levels well reduces brush/roller marks.
-
Safety and Environmental Factors: Pro tools and materials often have better safety features or lower emissions / VOCs, better finishes that resist mildew/mold (which can affect indoor air), better tool reliability (less chance of breakage or hazards).
When Budget Might Be “Better” or Enough
As noted earlier, there are times budget materials or tools are sufficient or even preferable:
-
Low frequency of use / hobbyist: If you only do occasional DIY, your premium tools may sit idle too long. For some items, the budget option gives “good enough” with minimal cost.
-
Experiments / prototypes / low stakes: If you’re prototyping, trying designs, or doing something you expect to scrap or redo, you might not want to invest in premium yet.
-
Tight budget / prioritization: If you allocate more budget to what matters most (e.g. quality glue for structural joints, better paint for visible walls) and skimp on less visible or less critical items, you can get a good mix.
-
Budget improvements: Sometimes small improvements in budget items help a lot (e.g. using a better brush, better roller cover, nicer finishing tools) without going full professional tools everywhere.
Final Thoughts & Recommendations
If you are writing for a site like DecordoesiT.com, where people are making decor / home improvement / furniture / crafts, here are recommendations you can pass on to readers:
-
Invest in glue quality when the joint or adhesion matters (furniture, load, outdoors). It’s one of the best places to spend more. Using a decent waterproof adhesive can save a lot of frustration later.
-
Prioritize paint quality for visible surfaces. The difference in coverage, finish, fade resistance is often stark. Better paint + good tools usually yields big visible rewards.
-
Get at least one high-quality tool in each category (saw, drill, sander, brush/roller). The rest of tools can be budget or mid-grade. The high-quality ones pull up the overall project.
-
Test small first: buy small quantities of pro materials to see how they behave; test brush/roller with paint; test glue joint. This helps avoid wasting full volumes or committing to poor materials.
-
Factor the full cost: materials + tools + labor/time + potential reworks. A more expensive product that yields fewer coats, less rework, and longer life may cost less per year or per project than a cheap one.
-
Read user reviews & forums: real-world conditions (humidity, temperature, traffic) reveal many weaknesses. For example, woodworkers’ forums frequently discuss that Titebond II/III outperform cheaper glues in outdoor, moisture conditions.
Choosing between cheap / budget vs professional / high-end materials & tools involves trade-offs. Budget items save money up front, and might be fine for simple, low-use, or decorative projects. But their limitations — strength, durability, finish quality, extra labor or rework — often become unavoidable when the projects are structural, visible, or used in harsh conditions.
For anyone serious about DIY and wanting long-lasting, quality results, investing in key areas (glues, paints, major tools) often pays off handsomely. The incremental cost is balanced out by fewer mistakes, better appearance, longer life, and greater satisfaction. If you combine premium materials/tools with good technique and prep, the difference in outcomes is often dramatic.